Thursday, December 4, 2025

Winter Scarf Projects

This is a favorite keepsake project for big and little people! 

It makes a great Christmas present and while Christmas is passed, now is the time to find the material on sale for next year!  
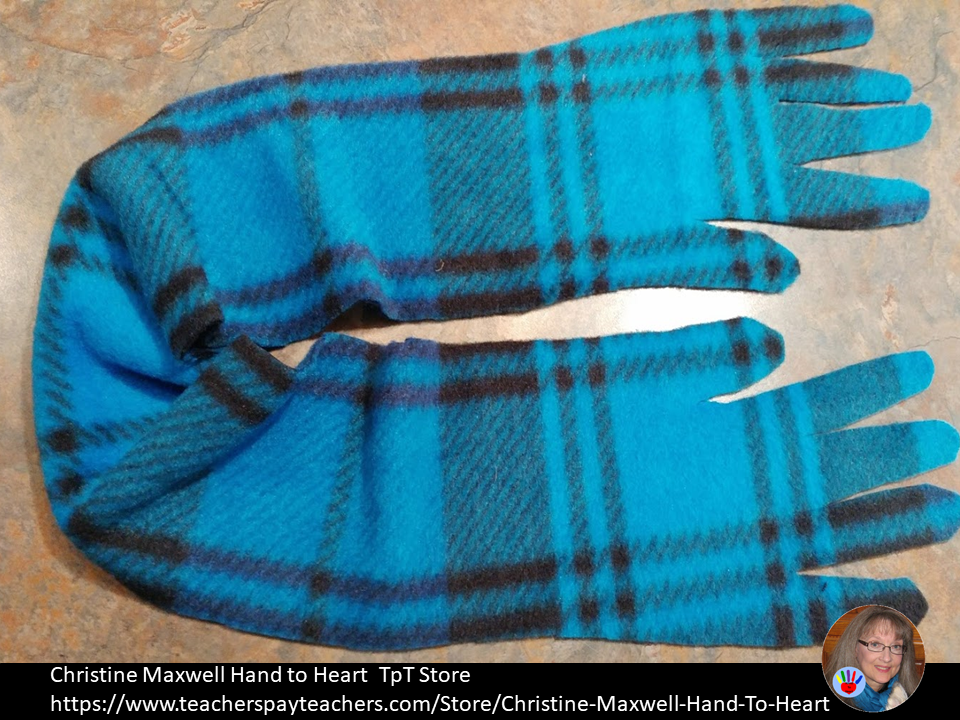
I traced my father's hands for a soft warm scarf that feels like a big hug. I truly wish I had done one with my mother's hands before she passed away....
It only requires paper and pencil for tracing hands, pins for holding the pattern in place on the material, sharp scissors and fabric.
I like to work with fleece fabric. It comes in so many wonderful colors and patterns. There is no sewing involved, just cut and use.
Another version of this scarf is the hands traced with the thumbs making a heart in the middle!
Then pin the pattern to the fabric and cut on the lines. The fingers act as fringe.
Then do the same on the other side.
This project would also be great for students to give to their parents. Depending on the age of the children, the pattern may need to be cut by an adult. 
 
This is when I like to ask high school students to be involved in the classroom after their school day is done for tracing hands and cutting them out. Grandmas like to come in to be classroom helpers. Mothers and fathers like to be involved too, but if the gift was for them, it won't be a secret.
 
It makes a one of a kind loving gift for someone special!!


Tuesday, December 2, 2025

Santa Express Geometric Christmas Train

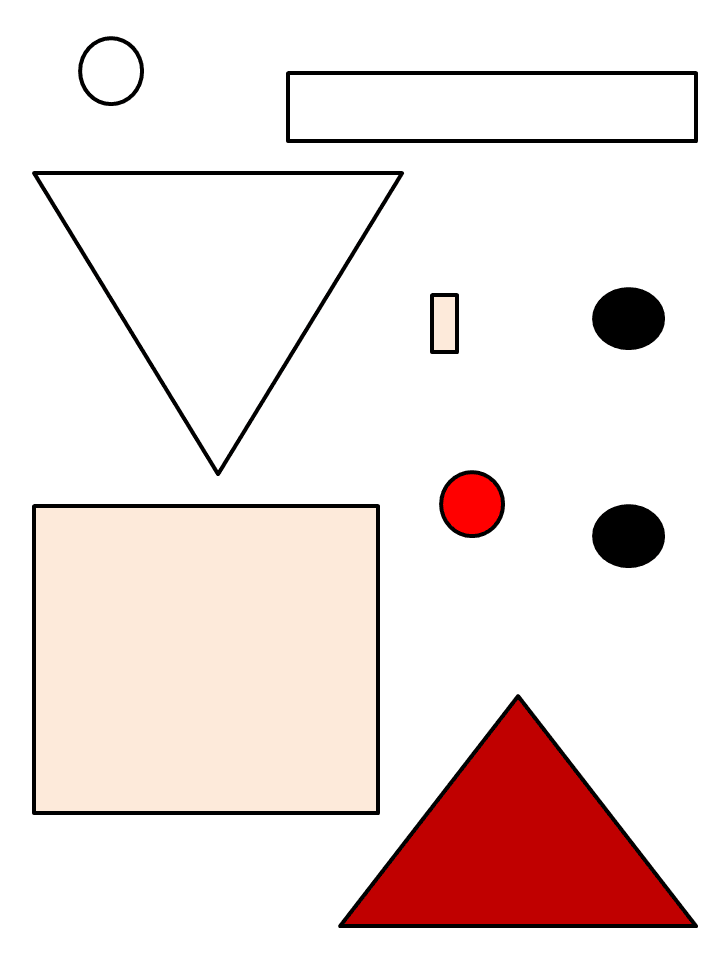
There are so many great stories about trains for children! A very special story for the holiday season is the classic "The Polar Express" by Chris Van Allsburg's. This fun product incorporates 5 geometric shapes into the building of a train engine,
plus a creative literacy activity.
 
 
 There are 3 complete train engine choices; 1 has red and green colors, 1 is grayscale colored, and the last is black and white. The train can be made as a stand-alone, but that is better printed on heavy paper. It can also be made by gluing the pieces down on another piece of paper.

This project is excellent practice for the fine motor skills of cutting and gluing. It is a good idea to give each child a baggie to hold their cut pieces until they have glued them all.

Introduce or review the five shapes; circle, square, triangle, rectangle, and hexagon. Decide if posting the picture of the finished Key that is included, so the children may use it for reference. When doing the black and white or grayscale engines, the children can color or decorate them when finished.

This activity can also be used in a center, but it is better if the pieces are laminated first. Some of the pieces are small so a baggie helps to keep any from getting lost.
 
The literacy activity has a black and white train paper with lines for writing and reading their creative stories. There is a cover sheet to make these stories into a class share book the students can read and reread again and again.
 
 The Geometric Train can be used for other stories about trains.

Some examples are:
1. Smokey by Bill Peet
2. Crack in the Track (Thomas the Tank Engine Story)
3. Little Train by Lois Lenski
4. The Little Engine that Could by Watty Piper
5. Steam, Smoke, and Steel: Back in Time with Trains by Patrick O’Brien
6. Big Book of Trains by DK Publishing
7. The Goodnight Train by June Sobel
8. The Potty Train by David Hochman
9. Dinosaur Train by John Steven Gurney
10. Freight Train by Donald Crews
 
I have another train product that can also be a Christmas train activity,
but can be used at other times of the year too.
Christmas Train Do Together Parent/Child Homework Activity
 
There are many other geometric activities and money saving geometric bundles in my store.
Geometric Activities
Also See:
Christmas Activities
Puzzles & Games
Colors & Shapes
Free Activities

Enjoy this holiday season!

Trains for Christmas!

Planning for Christmas activities already?
There are so many great stories about trains for children!
 
A very special story for the holiday season is the classic
"The Polar Express" by Chris Van Allsburg's.
 
Some other examples are:
1. Smokey by Bill Peet
2. Crack in the Track (Thomas the Tank Engine Story)
3. Little Train by Lois Lenski
4. The Little Engine that Could by Watty Piper
5. Steam, Smoke, and Steel: Back in Time with Trains by Patrick O’Brien
6. Big Book of Trains by DK Publishing
7. The Goodnight Train by June Sobel
8. The Potty Train by David Hochman
9. Dinosaur Train by John Steven Gurney
10. Freight Train by Donald Crews
 
I have two special train activities that can be used for Christmas!
The first one is a creative arts and writing activity.
This activity includes the cover sheet, 2 train engine templates and parent letter.

One train template is a simple black and white version. For older children there is a more detailed gray version. Print the train template you decide to use, on heavy paper and send it home with the parent explanation letter.
 
Parent and child will decorate it together. The train can be covered with whatever, but it must stay attached when hung up. Plus, it shouldn’t be so heavy that it won’t stay taped to a wall.

Suggestions for decorations: glitter, pompoms, tissue paper, pipe cleaners, felt, foam, lace, paper clips, sprinkles, colored rice, pictures, beads, sequins, shells, feathers, flowers, cotton, fake jewels, nature materials, sand, popsicle sticks, toothpicks, fabric, papers, foil, string, recycling materials, whatever you have around the house.
 
They need to put a picture of their child in the engine cab, so it looks like he/she is the engineer. When finished the student will bring back to school a Christmas Train to share with the class. It then becomes a prompt for story writing and telling.

It is always fun to see the different ways to decorate the train! They make a wonderful seasonal wall or bulletin board display! It can also be done in class instead of sending it home or send it home with older students that do not need parent help.
 
I have many different products similar to this to do during the year! Parents love doing these with their children!
 
The next activity is a fun product and has been very popular, so I am sharing it again!
This fun product incorporates 5 geometric 2D shapes into the building of a train engine, plus a creative literacy activity.

There are 3 complete train engine choices; 1 has red and green colors, 1 is grayscale colored, and the last is black and white. The train can be made as a stand-alone, but that is better printed on heavy paper. It can also be made by gluing the pieces down on another piece of paper. This project is excellent practice for the fine motor skills of cutting and gluing. It is a good idea to give each child a baggie to hold their cut pieces until they have glued them all.

Introduce or review the five shapes; circle, square, triangle, rectangle, and hexagon. Decide if posting the picture of the finished Key that is included, so the children may use it for reference. When doing the black and white or grayscale engines, the children can color or decorate them when finished.
 
It can also be used in a center, but it is better if the pieces are laminated first. Again some of the pieces are small so a baggie helps to keep any from getting lost.

  The literacy activity has a black and white train paper with lines for writing and reading their creative stories. There is a cover sheet to make these stories into a class share book the students can read and reread again and again.
 
I also have many other products for 
that can be used during the year.
 
Wishing you a fun filled holiday season!

Monday, December 1, 2025

Environmental Print Connects Beginning Readers With Letters, Sounds and Words!

The words we see in our environment each day are called Environmental Print. It is the print on logos, labels, wrappers, signs, etc. There are many children that learn the letters of the alphabet and some learn how to read, just from exposure to this everyday language. 
 
 One of the first words is STOP.

We can use these to encourage the learning of letters, sounds, and words. Talk about the letter names, what sounds they make, how is the word spelled and what does it spell.
 
 Little learners like to read and reread the pages.

A fun activity is to create an Environmental Print ABC Book collecting words from foods, jars, drinks, snacks, boxes, signs, etc.

I have a priced activity in my store called Environmental Print ABC Booklet that will let you download an A thru Z booklet. Simply put the pages in order and staple on the left side. Then you and your child can fill it with images you find each day. 
Enjoy!

Tuesday, November 25, 2025

Christmas Advent Activities

Tis almost December, the season for many celebrations!
Children like to countdown until special days because it helps with the waiting.
It is better to get the activity ready early!
 
The first one is free and all that is needed are cotton balls! The download comes in color or black and white for coloring.
 
Simply start on December 1 and glue a cotton ball on the number one on Santa's hat.
Glue a ball on each number as the day arrives. After 25 days he makes a beautiful picture!
If cotton balls are not available the child can color in each number.
 
There are math activities that can be done during the month using Santa, counting days that have cotton balls, then how many days left, odd and evens, etc.
 
This also makes a great early present!
Print the picture out and give the child a baggie with 25 cotton balls!
 
 
 Another product is a little larger and has two versions, the 12 day or the 25 day advent tree.


The 12 Days Tree has a green border around it and is made of 4 SHEETS of 8 ½ by 11 paper. It is 16 inches tall and 21 inches wide.

The 25 Days Tree has a red border around it and is made of 6 SHEETS of 8 ½ by 11 paper.
It is 23 inches tall and 21 inches wide.
 
This includes 42 fun activities that can be done during this advent time!
After printing out the desired tree, trim some edges to allow the pages to fit together like a puzzle. If you want the tree to be one big poster, glue together and then laminate the whole thing. If you prefer to assemble the tree each year, laminate each page, cut the pages out, and lightly tape the tree together.

Print the activities pages out. The thicker the paper, the more durable the pieces will be. Laminate and cut apart the individual pictures. There is an extra blank page for adding other activities of your own.

Decide the activities to be added to the tree. If using the tree one time, the pictures can be glued to the tree. When using the tree over again, it is better to attach Velcro to the squares on the tree and the back of the pictures or use tape lightly to hold them on.
 
 
 The last product is not really an advent calendar activity, but can be used to create an advent book.
 
This is really an ABC Christmas book.
I have two versions, one without tracing words and the other has words to trace.
 
 
They illustrate a page a day can be done until Dec. 24 then the last pages can be finished.
 
For each page I have different words to pick for the letter. For example letter Cc has the words; cookie, candle, candy cane, carols, Christmas, card, candy, coal, camels, Christ Child.


 When finished you have a keepsake book that can be read and reread over and over!
 
If you have a classroom of students the book can be used as a class made book!  
Each child can illustrate a letter page with the word they pick and the finished pages can be collected into a class book to share.
 
So many fun ways to countdown to that special day!

Monday, November 24, 2025

The Sweaters of Christmas!

Oh, the sweaters of Christmas, they have been given such a bad rap!

I love Christmas sweaters!
 
It was very special to have a decorated sweater for Christmas as I was growing up! It was even better if they had cute pictures, ribbons, bows, bells and sparkly thread.

Christmas-themed sweaters were first produced on a grand scale, when the Christmas holiday was becoming increasingly commercialized. Initially referred to as “Jingle Bell Sweaters,” the first sweaters saw decades of popularity!
Then came the word "ugly" when referring to Christmas sweaters. 
 Gaudy, bad taste, tacky, the more stuff on them the better! People hold parties to celebrate the worst sweaters of the year!
So for fun I created a cute craft activity for children to make their own version of the Christmas sweater. It is one that can also be done with parent help as a family project. 


Decorate the Sweater
 
This adorable Christmas activity includes the cover sheet, 4 different blank sweater templates to use and a parent letter.
When finished, it then becomes a prompt for story writing and telling. It is always fun to see the different methods of creating an ugly sweater!

Also see my other activities for:
 
Maybe you will have a wonderfully ugly sweater of Christmas!
I'm pretty sure I will! 

Christmas Free Santa's List and Geometric Shape Activities

Another Christmas Free product to share with you is a very simple letter to Santa activity!
It comes in color or black and white, with some suggestions for using. It can be used even with the littlest learners because they can dictate what they want to say.
 
In my last post I shared a another FREE activity for a Christmas Train.
 
I also have many other fun products that use the same geometric format.
A good activity for doing this is my
It has a very simple beginner geometric Santa included
that has only a few parts to cut and put together! 


 Again all of these activities are in color, black and white or grayscale.
I also have the 
 Two favorite characters.
 
Geometric Christmas Green Grouchy Guy
Plus the Christmas Reindeer and Nutcracker!
 
I think this one is my favorite one
 
Geometric activities are not the only products in my store for Christmas or other times of the year!
 
I would love for you to visit and see what I have to make learning fun!
 

Thursday, November 6, 2025

Here A Turkey, There A Turkey, Everywhere Turkeys And Turkeys!

Looking for a different and simple way to create the turkey bird with little people?
 
 This project uses pinecones which can be found anywhere that there are evergreen trees. While there are many different kinds of cones, for this activity I used the rounded ones. They have an evergreen tree shape when sitting on their flat bottoms.
After gathering them, I want to make sure that they are free of any tiny hosts that could be
hiding in them. I place them on a foil lined cookie sheet and 
bake at 250 degrees for about 45 minutes.

It makes the house smell like a pine forest!
To make the turkey body turn the cone on the side and glue it to a circle paper base. Allow it to dry for a day before adding the other parts. 

I used a heart punch to create the pieces, but you do not need a punch to do this activity. 
I will explain with two other ideas, so keep reading!
The head is one half of a heart and add a paper beak and waddle from paper scraps. The eyes are wiggly just for fun, but can simply be paper circles from scraps. Make the head completely flat on the table and let dry for a little while. It goes on the front of the cone with the branch pieces called scales sticking out.

The tail feathers are colored papers, but can be printed ones for a different look. They go near the back side of the pinecone between the scales with a touch of glue to keep them in place. See the picture above of the side turkey.

Little touches like hats, bows and fake leaves are not needed, but fun to add.
No heart paper punch, no problem!

A simple way for little people to create hearts is to have them fold a piece of paper in half. They grasp the paper on the folded side with their thumb on the top and pointer finger behind as shown in the picture. Thank you to my husband for letting me use his thumb in the picture!
They can then trace around the thumb or have another child do it, then cut on the line. When they open it, they have a heart! It is such fun to see all the different shapes and sizes of the hearts.

 Another easier way is to have them fold the paper in half and write the number 2 on the fold. Then they only cut the half heart part of the two on the fold and not the tail.
When they open it again there is a heart!
They are always so proud that they have learned how to make hearts and
will remember forever!
A Thanksgiving activity that is fun to do with making these turkeys is to have the child creative spell what they are thankful for and write it on each tail feather. The littlest learners can dictate what they are happy to have and someone can write them on the feathers for them.
This little turkey is thankful for his friends, family, dog, food, house and toys!
What a cute keepsake for the feast table!

Happy Thanksgiving!

Monday, June 16, 2025

Planning For Next Year.....Already!

Is it too early to start thinking about educating little learners for next year?
No!     Yes!    No!    Yes!    No!    Depends.....

It is never too early to start thinking about getting ready for the next group of littles, 
but I may not be ready to act on it yet. It varies from year to year. 

Sometimes I just need a break. 
Other times I am ready to jump right in creating new activities and products! 

Jumping in now!
I have created a fun product to welcome each student.
 What an exciting and fun way to have the children enter or lineup each day!

There are 3 poster pages, 22 card pages with two animal welcomes on each sheet for 44 sentences, 4 welcome sentences without animals, the title page and a page of directions.
Assembly: Print the pages out on the front side only. The thicker the paper, the more durable they will be. Laminate if desired.

Poster: The poster has three parts, simply line them up together. The page with the top line is at the top and the page with the bottom line goes at the bottom. Notice the middle section does not have a top or bottom line. They can be stapled or taped together. You can also not use the middle section and just put the top and bottom together. 
You will need to trim a little off the posters to have the border match exactly right.
Cards: There are 44 welcoming animal cards with words and pictures. There are two animal card sentences to each sheet. These can be cut apart into two separate cards or simply keep them together.

The name of the animal is on each card with a rhyming word of welcome or movement. I have also used the color words red, yellow, green, blue, purple, orange, black, brown, gray, tan and white in some sentences.

Activity: When introducing the activity at the beginning of the year show the children the cards and explain what each animal is. Read the sentences and discuss the meanings of the different words.
You decide or decide together what movement or motion is to go with each card. For example, “You rock, peacock.” could be a fist bump as they come in the door. “High ten, brown wren.” could be two high fives with both hands. Part of the fun is making up and creating an action that goes with each animal!
As the little learners practice the different cards and sayings they will be able to read them, plus they become a learned memory. They will also be able to pick and choose which animal they might decide to be as they enter each day or lineup and doing their own movement or motion! 
What animal do they feel like today! 
 
Are you ready to jump in?


Related Posts Plugin for WordPress, Blogger...